Twitter Updates

Friday 31 July 2009

Word Visio Stop capitilisation

Finally got around to switching off first letter capitalisation (capitalization) For word 2007 and visio 2003.

The options are in the AutoCorrect Menus if you know how to find them. Microsofts instructions for Visio are here:
http://support.microsoft.com/kb/290586

Basically, Visio -> Tools -> AutoCorrect Options, DeSelect "Capitalize first letter of sentences"

StopVisio2003ManglingYourText

For Word 2007 I had to make the mistake then select the smart tag to get to the Auto correct options. but then the options were very similar to Visio.

StopWord2007ManglingYourText

Thursday 30 July 2009

Create Icons *.icns for OS X

To create icons for your OS X Applications, first create a master 512pixel x 512pxel master image. create smaller versions if required ie if you want the smaller logos to be different.

The size options you can create for are:
512x512
256x256
128x128
32x32
16x16

Once you have your images, my logo is simple so I only created one 512 master copy, from photoshop save as a tiff with transparency and Image compression:no compression, Layer Compression:discard all layers and save a copy.

Then open (you need the developer tools xcode):
/Developer/Applications/Utilities/Icon Composer.app

Then drag you 512x512 tiff on to the largest square I then let it auto scale this image for the smaller options. Then just go File Save As. and you *.icns file is created.

A very helpful tutorial was.
http://tutorialdog.com/how-to-create-icons-for-mac-os-x/

A generic guide to integrating the icns into your mac app is:
http://stackoverflow.com/questions/646671/how-do-i-set-the-icon-for-my-applications-mac-os-x-app-bundle

Because I am working on a project setup by xCode I can just replace the file in:
ProjectRoot/resources_macosx/projectName.icns

Wednesday 29 July 2009

File Release on SourceForge

Recently SourceForge made an untested 'Upgrade' which broke my main method of making file release. it would have been ok if the new systems put in place worked but they do not!

Webdav has been disabled as a method for upload. The recommend options in order that they seem to recommend are Web interface [1], scp [2], rsync [3] and sftp [4].
[1] Does not work at all.
[2] Can not create new folders or delete files.
[3] Keep a copy of all versions of files, I only want to keep the latest version.
[4] Works but you need to know where to look and require a good client (CyberDuck for OS X).

You need to be a SourceForge member to view this help page!
https://sourceforge.net/apps/trac/sourceforge/wiki/Release%20files%20for%20download

So SFTP it is then,

Server : frs.sourceforge.net
Username : jsmith,fooproject
or command line
$ sftp jsmith,fooproject@frs.sourceforge.net

This will take you to:
/home/groups/f/fo/fooproject
you actually want to be here for file releases:
/home/frs/project/f/fo/fooproject/

The Project webpage is here:
/home/groups/f/fo/fooproject/htdocs

Windows DNS

On Linux and Mac OS X systems if you need/want to hard wire a computer name to an IP address so that scripts can work reliably on startup, before DNS has really kicked in, you can easily add a line to the /etc/hosts file.

I just discovered that this is also easy on Windows (XP at least). Just add a line to the file:
c:\WINDOWS\system32\drivers\etc\hosts

Some thing like
192.168.1.1 router

Then you can just type http://router in to your browser to be taken to your router login page.
Thanks to @philip_roberts

Sunday 19 July 2009

Mac OS X and sshd

To ssh into a mac you need to turn this service on which is very easy.

From the terminal (/Applications/Utilities/Terminal.app)
$ ssh localhost
>ssh: connect to host localhost port 22: Connection refused

Now go to '/Applications/System Preferences.app' -> 'Sharing' then enable 'Remote Login'
Sharing

Now Try ssh again:
$ ssh localhost
Password:
Last login: Sun Jul 19 16:31:39 2009 from localhost
$

OSX eat my GNU

Trying to setup snapback2 bbackup software but started running into issues because the os x commands are based on the BSD variants not the more standard GNU versions used on most Unix's and Linux's.

Tried some manual installs but eventually after hitting a few dead ends found the package in port (mac ports formerly darwin ports).

1) Assuming Mac Ports is already installed (if not do that first, to tired to give instructions for that)
2) $ sudo port install coreutils
NB: since os x 10.5 sudo only works if you have a password set.
3) Get that pesky BSD cp out the way
$ sudo mv /bin/cp /bin/cp-osx
4) link to the new shiny GNU
$ ln -s /opt/local/bin/gcp /bin/cp

5) test old version
$ cp-osx --version
>/bin/cp-osx: illegal option -- -
>usage: cp [-R [-H | -L | -P]] [-fi | -n] [-pvX] source_file target_file
>cp [-R [-H | -L | -P]] [-fi | -n] [-pvX] source_file ... target_directory

Note The excellent handling when requesting the version!

6) Now the new version:
$cp --version
>cp (GNU coreutils) 7.4
>Copyright (C) 2009 Free Software Foundation, Inc.
>License GPLv3+: GNU GPL version 3 or later .
>This is free software: you are free to change and redistribute it.
>There is NO WARRANTY, to the extent permitted by law.
>
>Written by Torbjörn Granlund, David MacKenzie, and Jim Meyering.

This can be repeated for any other GNU commands you would like to map from /opt/local/bin/ to /bin. Most are prepend with g but if it is a 3rd party script that you are trying to get working it is often easier to make the default the gnu version.

Saturday 18 July 2009

CocoaDialog DialogBoxes for scripts

I just discovered CocoaDialog, this allows scripts (Ruby, Perl, Bash) to ask for user input in a pretty way. Will be useful for creating double click runnable script/programs

Download .dmg and copy CocoaDialog.app to /Applications/

test run from bash terminal (/Applications/Utilities/Terminal.app)
$ /Applications/CocoaDialog.app/Contents/MacOS/CocoaDialog standard-inputbox --title "Your Name" --informative-text "Enter your name"

Example should show this:
CocoaDialog-standard-inputbox

Pressing ok will return:
>1
>enteredText

Pressing cancel will output:
>2

Friday 17 July 2009

Setting up Time Machine on any NAS

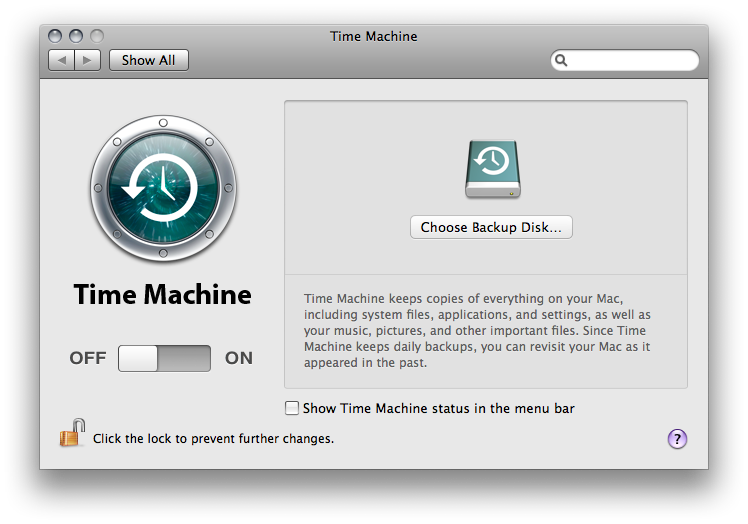
Start by opening the Time Machine option pane, "/Applications/System Preferences.app" then choose Time Machine under "Systems"

I would also like to point out something I find very odd which is that Time Machine needs to target a particular partition (Drive letter in windows speak, or volume in mac speak). So for a network drive I would create a new network share called timemachine_computerName

[ADDED 20/07/2009 ]
Most of the following is to setup the new network share so that it will work with time machine. I have program TimeMachineAnyNetworkDrive which will setup most of this for you. then just copy the sparsebundle from your home directory to the networkshare and try time machine again.


First problem is apple does not allow any NAS (Network attached storage) device to be used by default, only their premium priced time capsule!

01NO-NAS

To allow non-apple network drives run this command (from the terminal):
defaults write com.apple.systempreferences TMShowUnsupportedNetworkVolumes 1

02NAS_ALLOWED

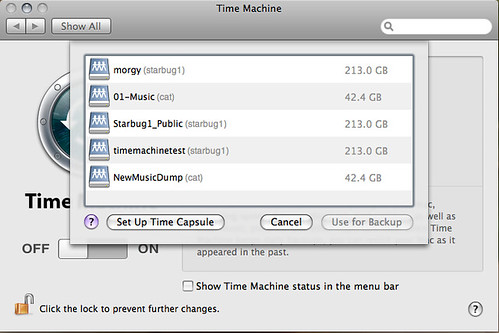
Selected NAS but after first attempt the backup fails.
03-NAS-DENIED

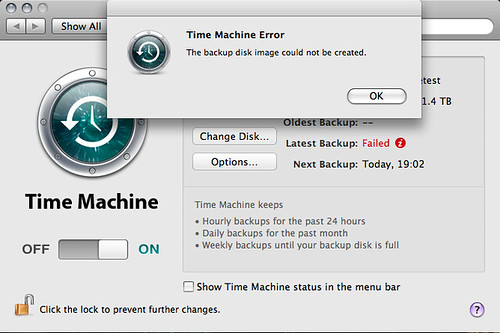
What we need to do is create a sparse dmg which gives timemachine all the required file system functions on any filesystem. For this we use the hdiutil command.
NB: The hdiutil command will only work on local (internal and external) drives not network drives.

So we create the sparsebundle (dmg) locally then copy to the remote drive, when copied through the command interface I got a few errors so I copied through finder (graphical interface).

The Sparse bundle name needs to be computerName_MAC.
All the following are typed from the terminal (/Applications/Utilities/Terminal.app) $ inputs > output from the terminal.

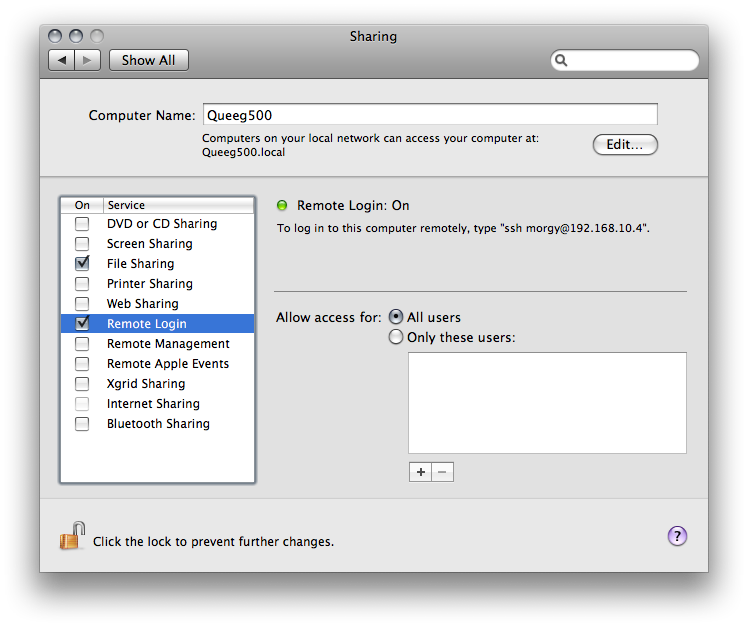
To check the computer name you can just run:
$ hostname -s
> Queeg500

The Mac address of the first wired port EN0 is normally used. Every network socket/wifi will have its own MAC. To find your MAC

$ ifconfig en0 | grep ether
> ether 00:1b:63:a6:7e:5b


Sparsebundles takeup only the size of the data they contain, but the size property limits the maximum size. Here we limit to 200Gigabytes.
cd ~
hdiutil create -verbose -size 200g -fs HFS+J -type SPARSEBUNDLE -volname "Backup of Queeg500" Queeg500_001d4ffac84b.sparsebundle
#may be better to move graphically
mv Queeg500_001d4ffac84b.sparsebundle /Volumes/timemachinetest/


Then try the timemachine backup again.
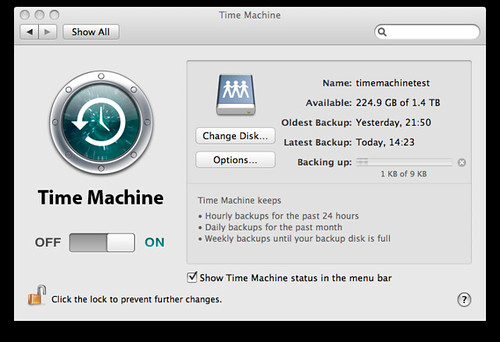
04NAS-WORKING


Very good article here.

Applescript What Property?

My apple script (applescript) just made a massive leap forward or at least my unerstanding of how people go about figuring it out. I never could work out how people new what all those scriptable properties where called until now.

Open Script Editor (/Applications/AppleScript/Script Editor.app) may be open a script you have been writting / downloaded.

The really clever bit:
from Script editor File-> Open Dictionary
Now choose the application you are scripting and you will get a browsable searchable list of properties that the script can get and set!

Monday 13 July 2009

Desktop Background

A nice background to help organise your icons:

http://www.flickr.com/photos/gr/182329376/in/set-72157594188036656

Friday 10 July 2009

Amazon Store

Just got my amazon associate store setup, not quite complete yet.
http://astore.amazon.co.uk/morgue-21

Thursday 9 July 2009

Amazon.co.uk lists

Amazon seem to hide the link to create lists for list mania so here it is:
UK: http://www.amazon.co.uk/gp/richpub/listmania/createpipeline
US :http://www.amazon.com/gp/richpub/listmania/createpipeline

Body Of Secrets

Body of Secrsts
ISBN:0099427745
About £9

Very interesting book on the history of the NSA and GCHQ.

Monday 6 July 2009

Disable jqs.exe on Windows

In my windows task manager I noticed a process called jqs.exe which had over 5,000,000,000 I/O Read Bytes the most out of any process on my computer by a factor of 4.

It is a java quick launch application which constantly brings a small part of java back in to main moemory. Sine I do not run java applications that often I do not mind a little bit of lag and followed the instructions here [1] to diable it

[1] http://jsbi.blogspot.com/2009/05/what-is-process-jqsexe-and-how-to.html

Saturday 4 July 2009

Ruby Parsing Command Line Options

Ruby has built in methods for dealing with parsing command line options, it is called optparse.

optparse rdocs

some optparse examples

A Small example (cut down from the above) showing most common requirments.
Also on github.


#!/usr/bin/env ruby

require 'optparse'
require 'optparse/time'
require 'ostruct'
require 'pp'

class OptparseExample


#
# Return a structure describing the options.
#
def self.parse(args)
# The options specified on the command line will be collected in *options*.
# We set default values here.
options = OpenStruct.new

options.verbose = false
options.time = 0
options.delay = 0
options.leftovers = nil


opts = OptionParser.new do |opts|
opts.banner = "Usage: example.rb [options]"
opts.separator ""
opts.separator "Specific options:"

# Boolean switch.
opts.on("-v", "--[no-]verbose", "Run verbosely") do |v|
options.verbose = v
end

# Cast 'time' argument to an integer.
opts.on("-t", "--time [TIME]", Integer, "Begin execution at given time") do |time|
options.time = time
end

# Cast 'delay' argument to a Float.
opts.on("--delay N", Float, "Delay N seconds before executing") do |n|
options.delay = n
end

# List of arguments.
opts.on("--list x,y,z", Array, "Example 'list' of arguments") do |list|
options.list = list
end

opts.separator ""
opts.separator "Common options:"

# No argument, shows at tail. This will print an options summary.
opts.on_tail("-h", "--help", "Show this message") do
puts opts
exit
end

# Another typical switch to print the version.
opts.on_tail("--version", "Show version") do
#puts OptionParser::Version.join('.')
puts "Version 0.1.0"
exit
end
end

options.leftovers = opts.parse!(args)
options
end # parse()

end # class OptparseExample

options = OptparseExample.parse(ARGV)
pp options
puts ""
puts ""
puts options.leftovers